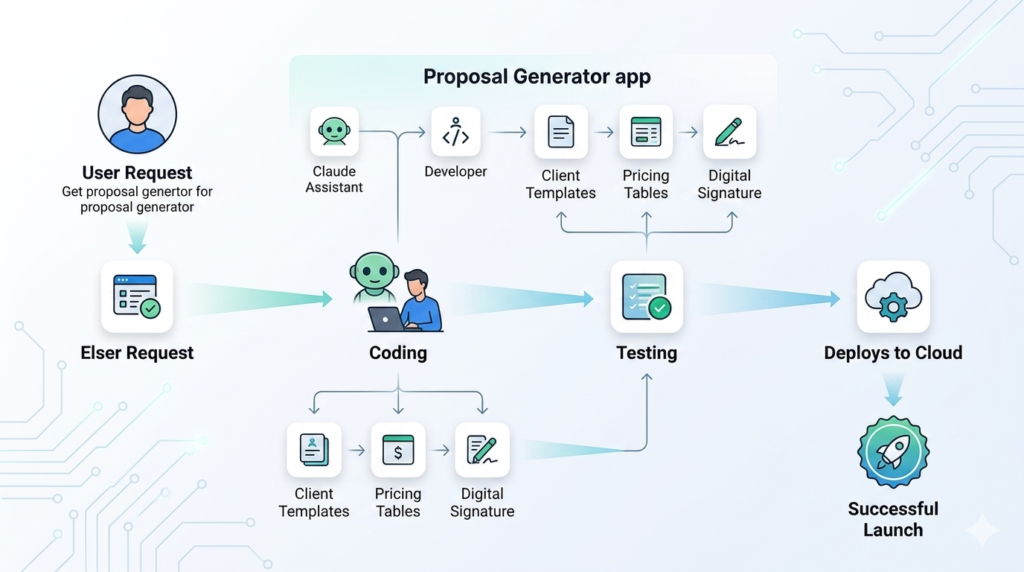
Claude Co-Work might be the most powerful AI tool available today—but only if you set it up correctly. Most people unlock merely 10% of its actual potential. This comprehensive guide will transform how you work with AI, showing you exactly how to configure Claude Co-Work to function as a tireless digital employee that works around the clock.
What Is Claude Co-Work?
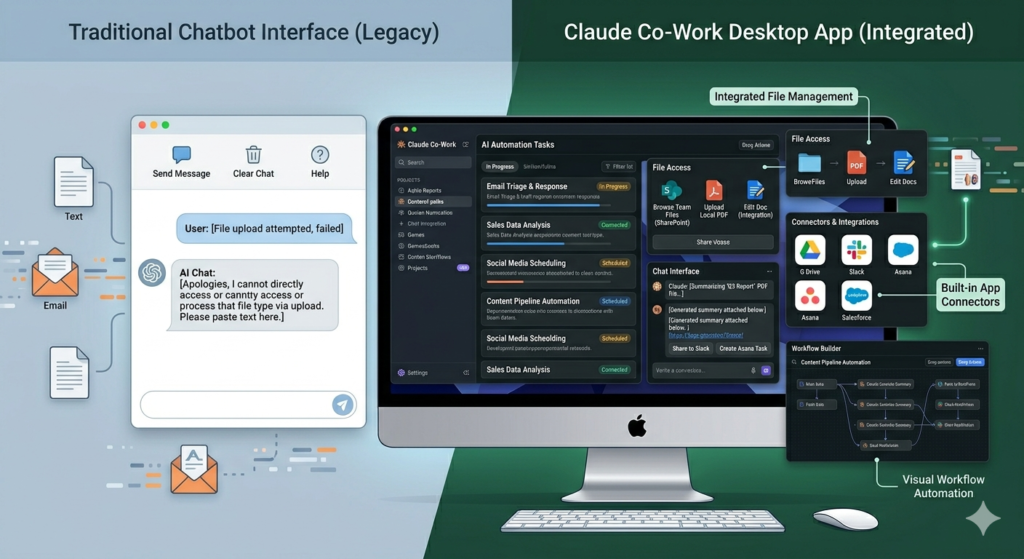
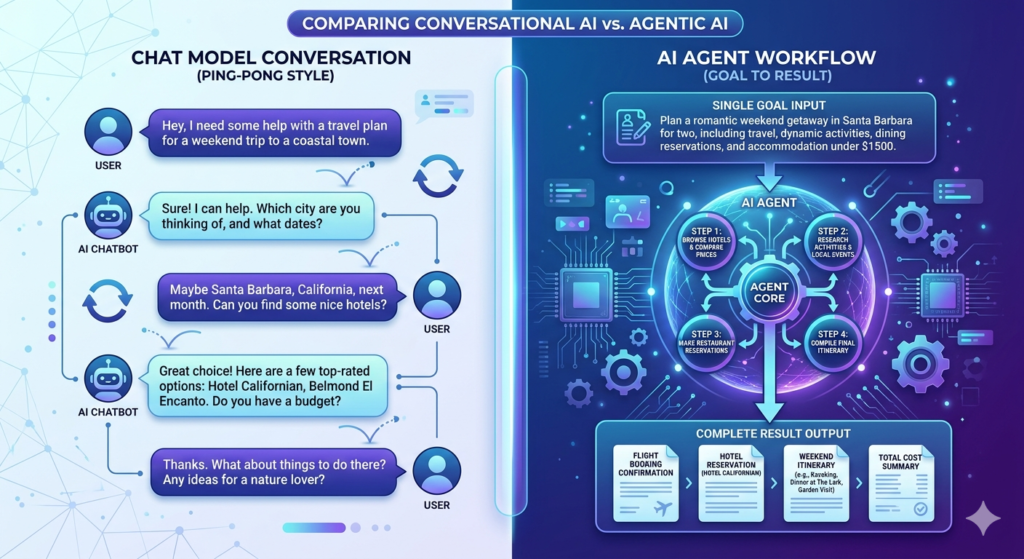
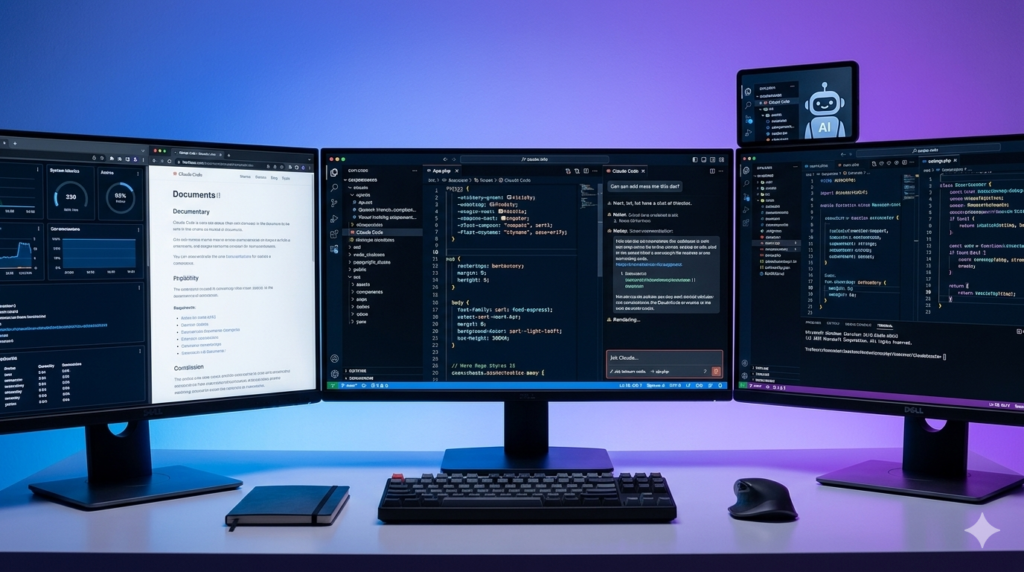
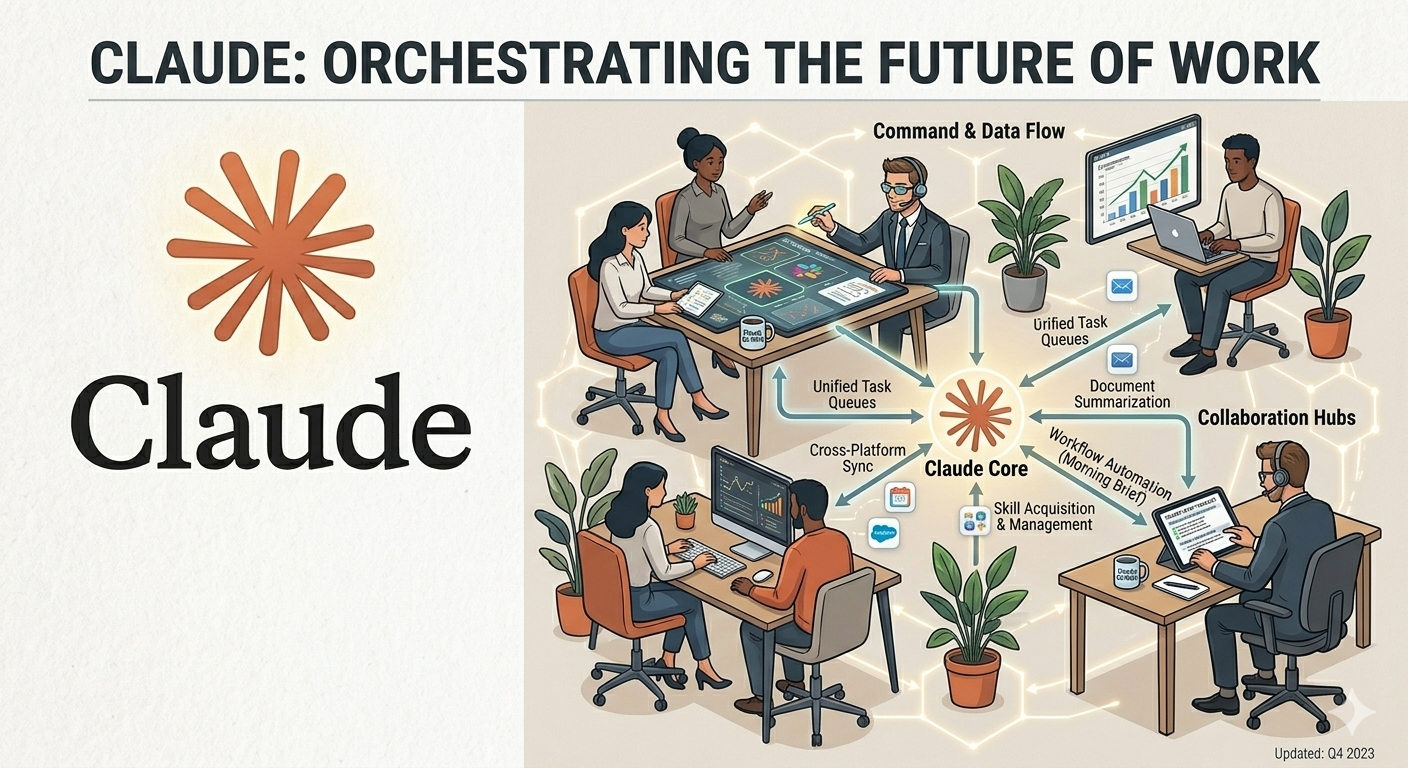
Claude Co-Work is a free desktop application from Anthropic that goes far beyond traditional AI chatbots. While most people treat AI as a simple question-and-answer tool, Claude Co-Work can read your files, connect to your applications, learn your workflows, and execute tasks autonomously—even while you sleep.
The platform runs on both Mac and Windows, offering four game-changing capabilities that separate it from every other AI tool on the market:
- Claude.md Identity File – A personalized configuration that tells Claude exactly who you are
- Custom Skills – Pre-programmed commands that execute complex workflows instantly
- App Connectors – Direct integrations with your favorite tools and platforms
- Scheduled Tasks – Automated workflows that run on your timeline, not yours
Why Most People Use Claude Co-Work Wrong
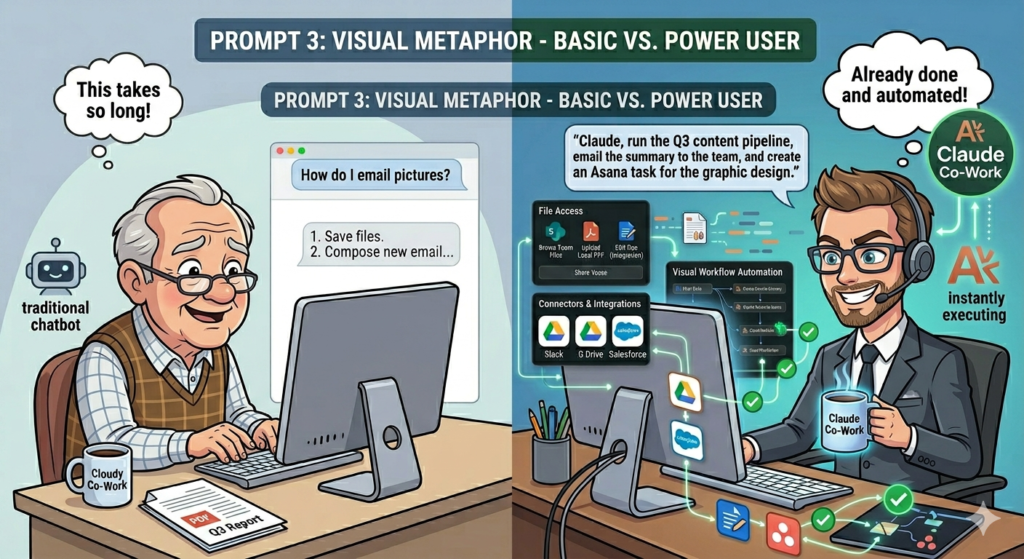
The typical user opens Claude, types a basic question, gets an answer, closes the app, and repeats this process tomorrow from scratch. This approach leaves 90% of Claude Co-Work’s potential untapped. Without proper setup, Claude has no memory of who you are, no understanding of your business, and no ability to access your files or applications.
The power user experience is entirely different. With the right configuration, Claude knows your business automatically, remembers where you left off, executes custom commands for every job, runs tasks while you sleep, and connects seamlessly to everything you use. It’s the difference between hiring a temporary helper versus training a dedicated employee who never forgets.
Step-by-Step Setup: Building Your Foundation
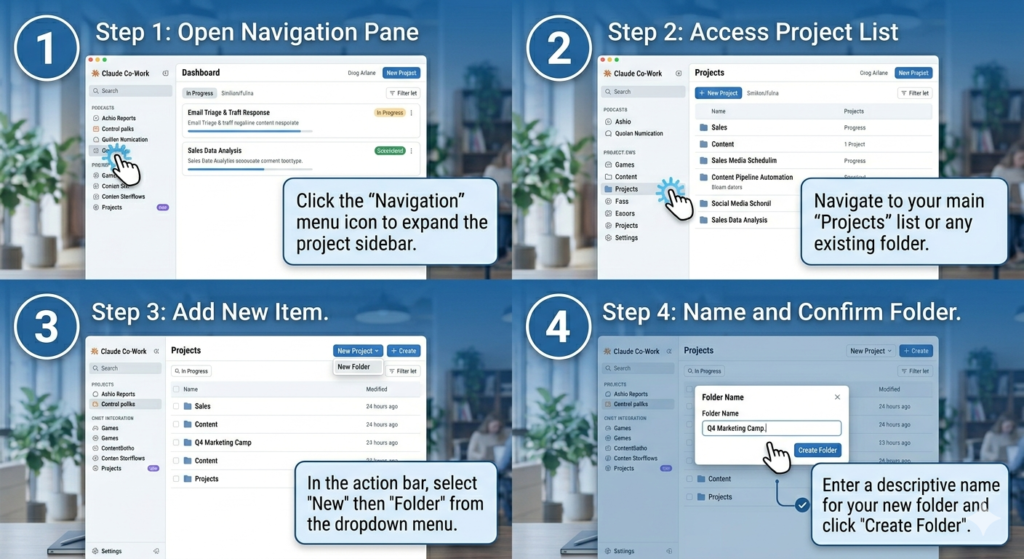
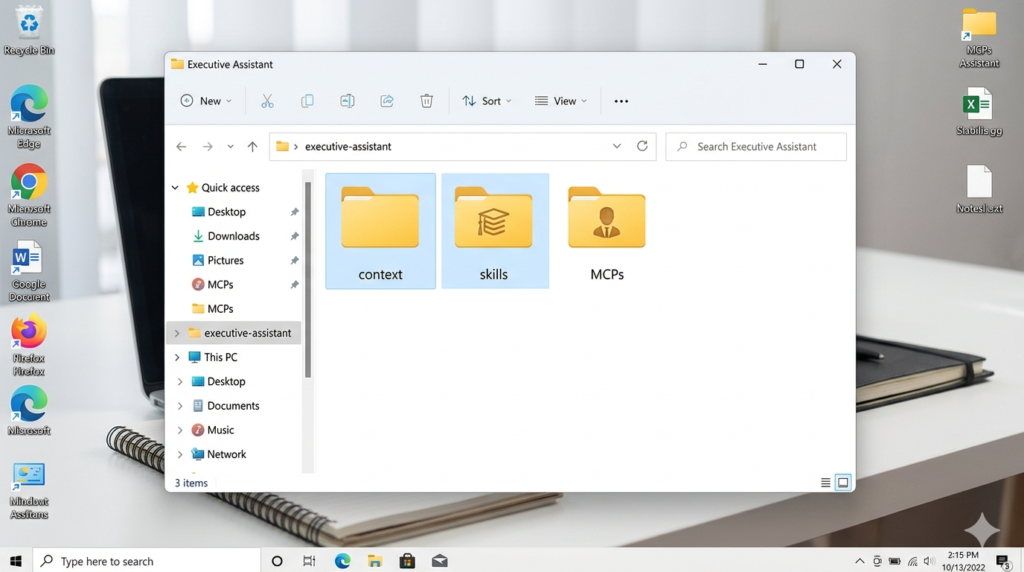
Step 0: Create Your Project Folder
Before diving into advanced features, you must point Claude to a dedicated folder on your computer. This isn’t optional—it’s the foundation that enables everything else. Download the Claude desktop app (not the web version) and create a new folder specifically for your Co-Work projects.
Think of each folder as a different “phone” in your life. Your work folder has access to Slack, Gmail, and calendar apps with work-specific commands. Your personal folder handles meal planning, budgeting, and journaling with a different identity. This separation keeps your AI assistant organized and context-aware.
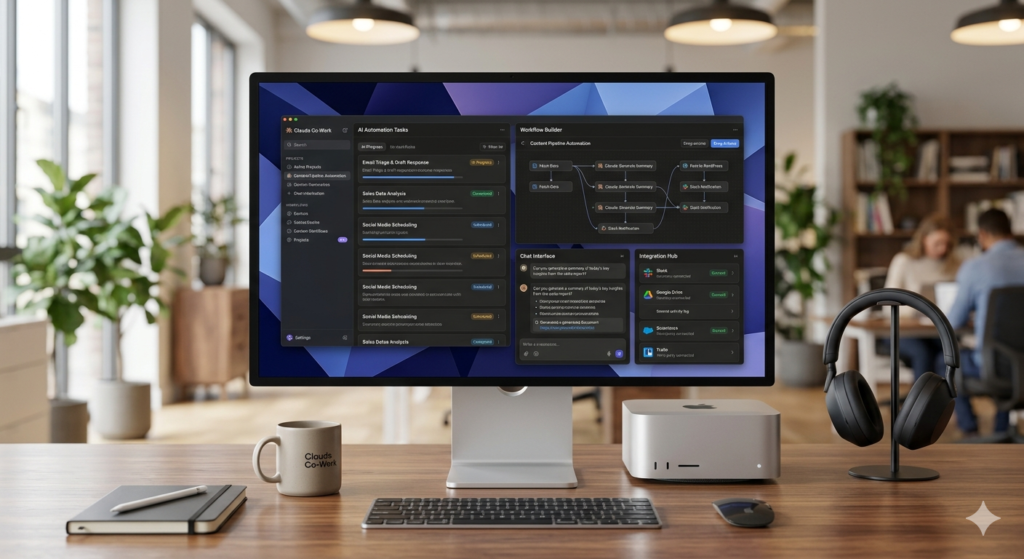
Inside each folder, you’ll eventually have:
- Claude.md file – Your identity and instruction manual
- Skills – Your custom commands and workflows
- Documents – Your files, data, and notes
- Outputs – Generated HTML dashboards, PDFs, and deliverables
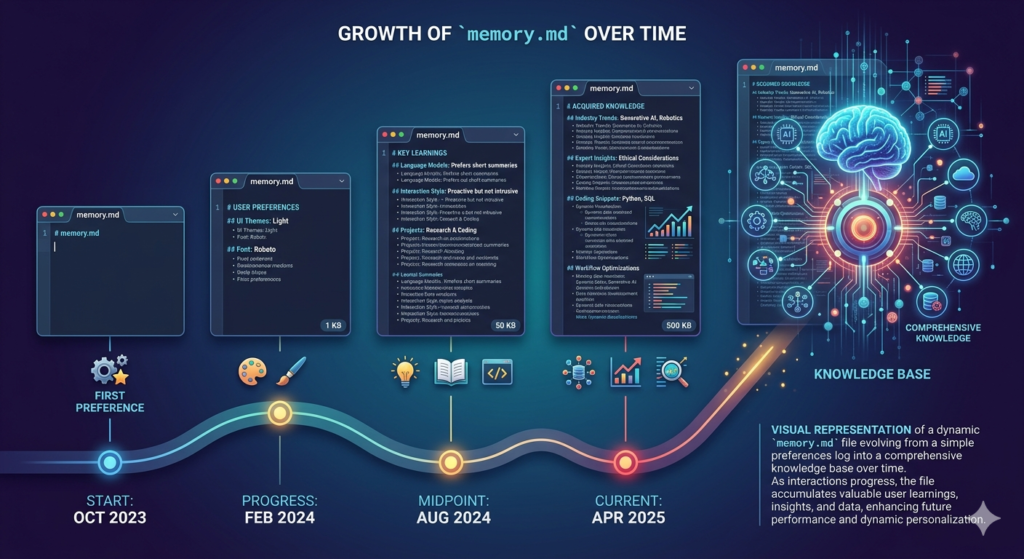
Step 1: Create Your Claude.md Identity File
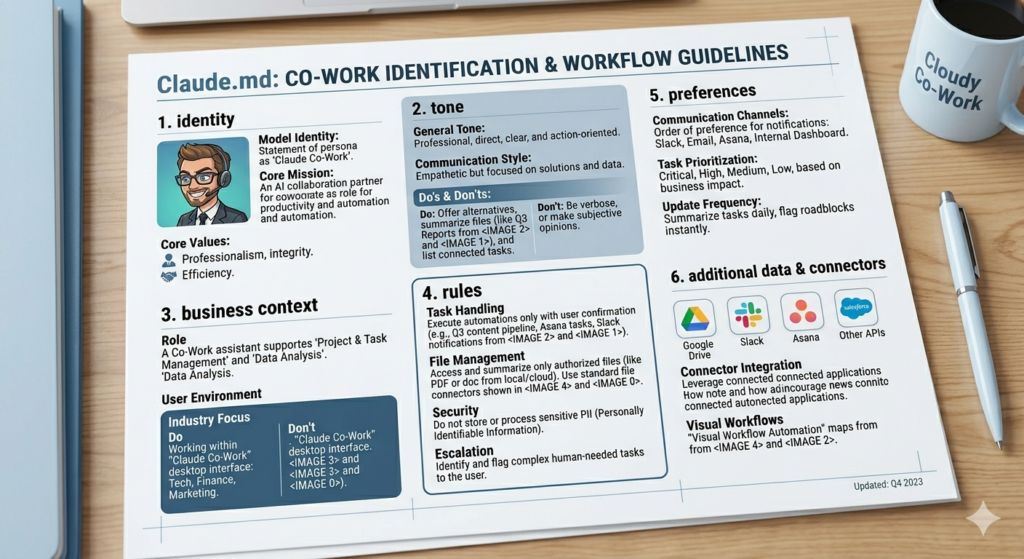
The Claude.md file is your AI’s onboarding packet. Without it, Claude starts every conversation fresh with no memory or context. With it, Claude reads your identity file before every interaction, automatically understanding your business, communication style, and specific requirements.
Your Claude.md should include six essential elements:
- Who You Are – Your role, expertise, and background
- Your Audience – Who you serve or work with
- Your Tone – How you prefer to communicate
- Business Context – Your industry, goals, and operations
- Rules for Claude – What it should always do
- What to Avoid – Specific don’ts and boundaries
This 5-10 minute investment pays dividends forever. Instead of re-explaining yourself constantly, Claude instantly knows how to interact with you perfectly every single time.
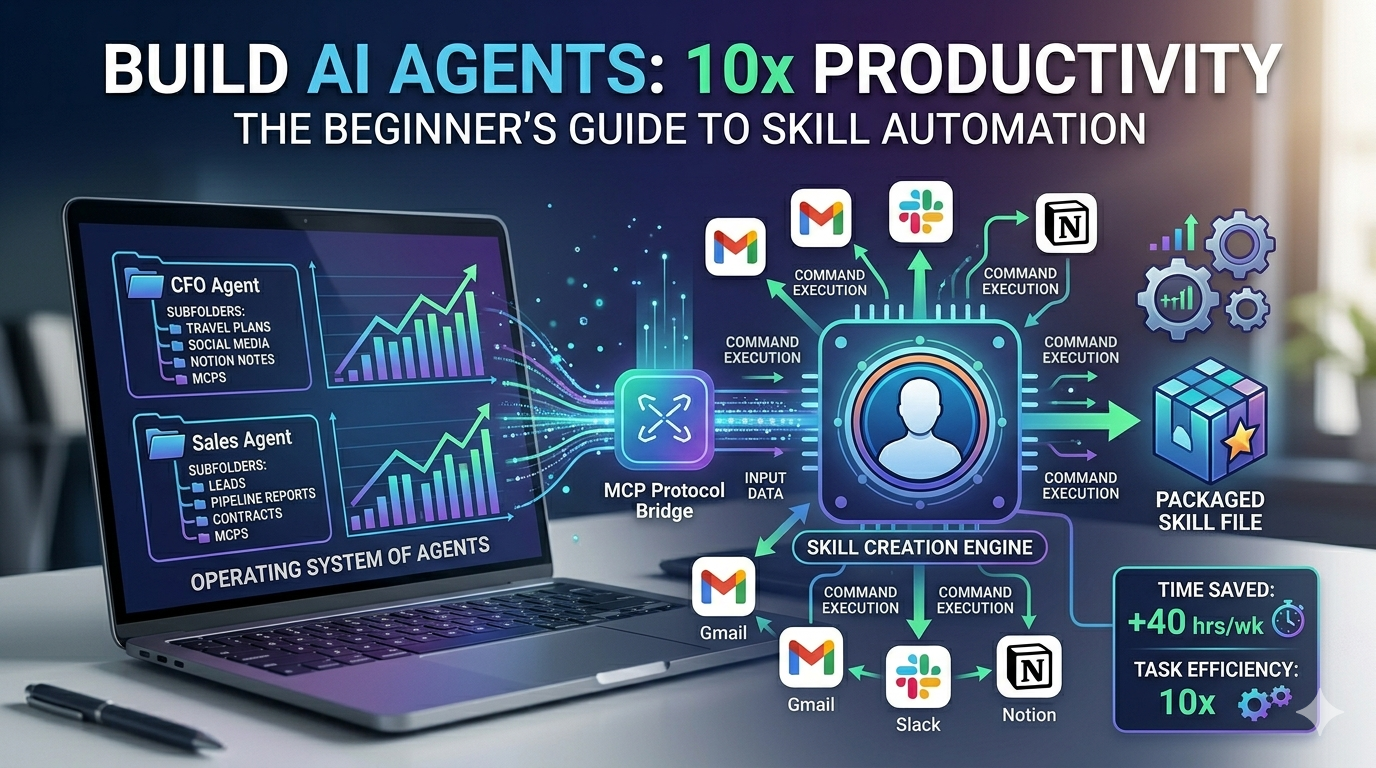
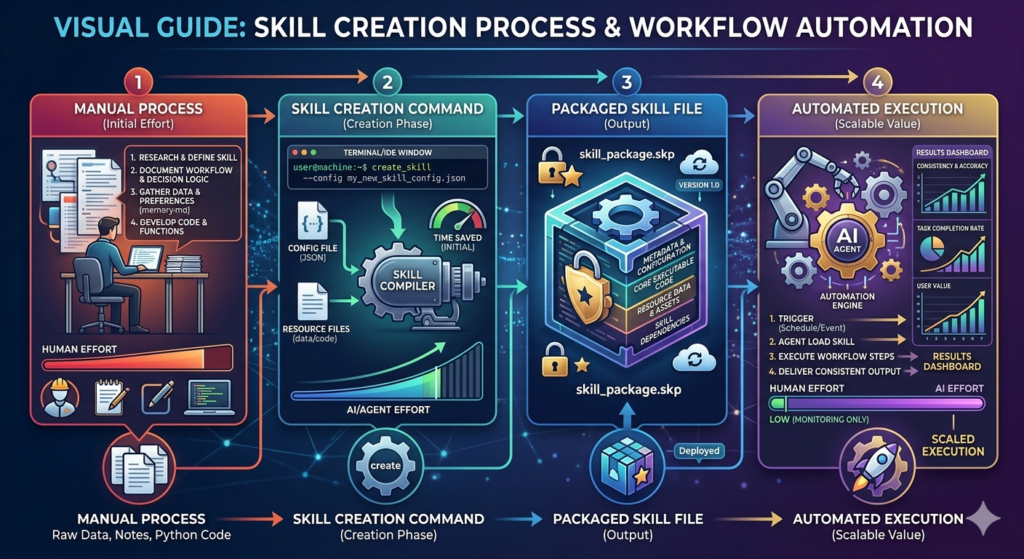
Superpower #2: Skills That Transform Productivity

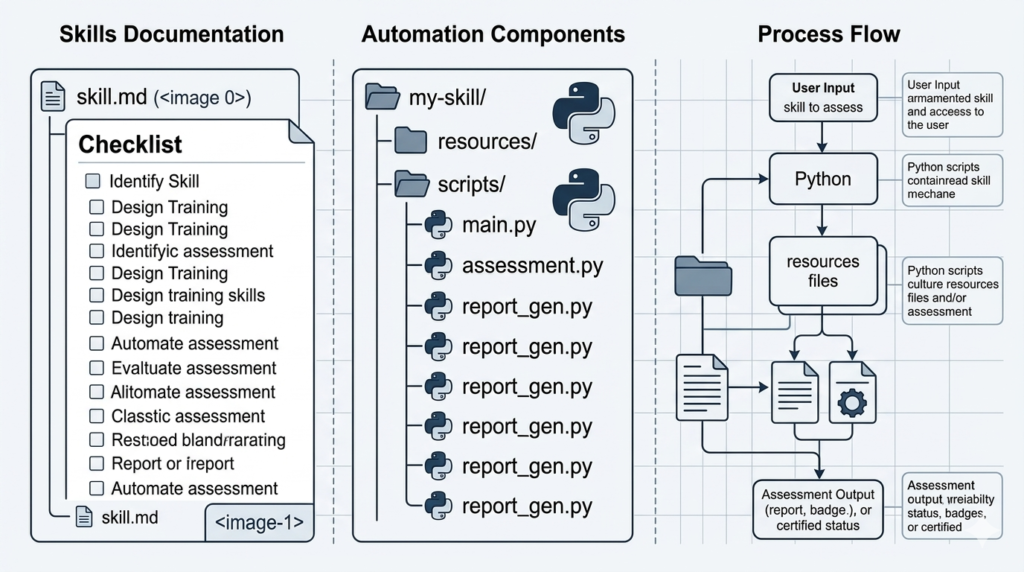
Skills are custom commands that teach Claude to perform specific jobs once and remember them forever. Think of them as apps for your AI—install them once, trigger them with a keyword, and watch Claude execute complex workflows automatically.
The 7 Essential Skills You Need
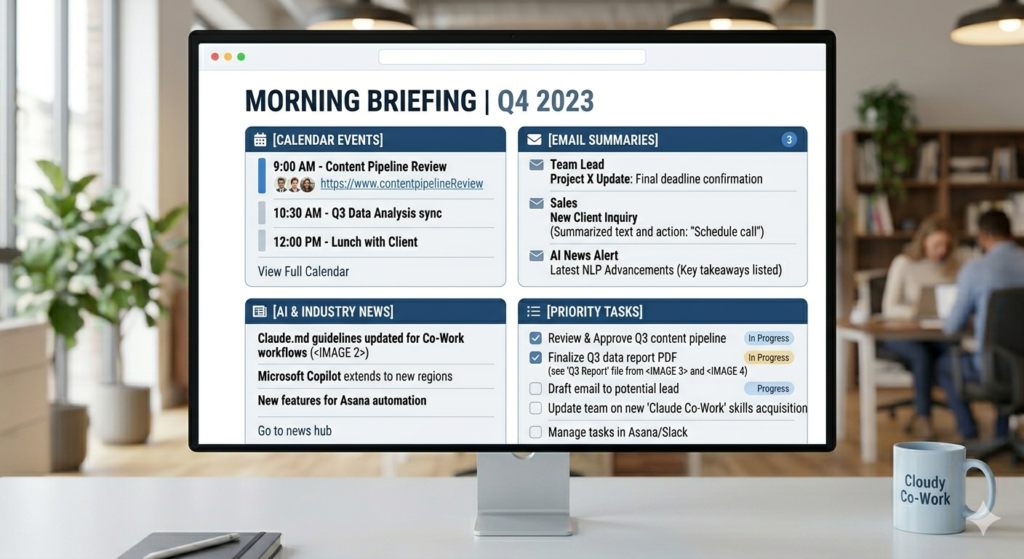
Skill 1: Morning Briefing Instead of opening five different apps every morning, this skill scrapes your calendar, email, AI news, and to-do lists to generate a custom HTML dashboard. You get meeting schedules, urgent emails, relevant news, and your top three priorities—all before you’ve had your first coffee.
Skill 2: Research Assistant Transform any topic into a structured research document with sources, data, and statistics. Instead of managing 15 browser tabs, Claude creates a professional deliverable with an executive summary, backed claims, and proper formatting ready to share with your team.
Skill 3: Meeting Notes to Action Items Paste a meeting transcript and receive a clean summary with specific action items, deadlines, and follow-up tasks. An hour-long meeting becomes 10 clear next steps, ensuring nothing falls through the cracks.
Skill 4: Slide Deck Generator Create full visual presentations from a single sentence. What normally takes 3 hours now takes 30 seconds. The skill generates professional slides with visuals, proper design systems, and compelling hooks—perfect for video creation, client pitches, or internal presentations.

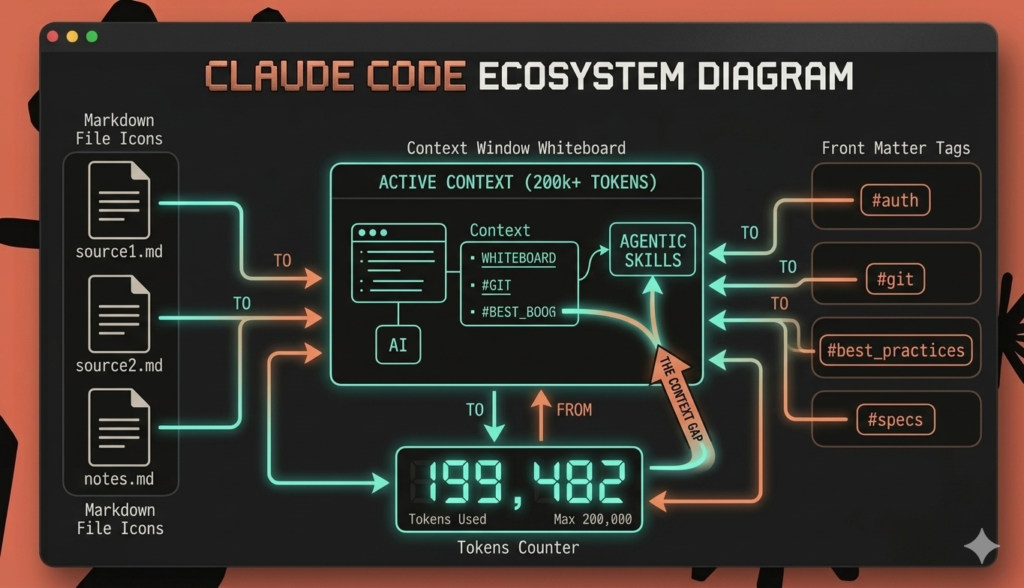
Skill 5: Visual Explainer Describe any complex concept, and Claude builds an interactive web page with diagrams, breakdowns, and visual representations. Perfect for understanding system architectures, business processes, or explaining concepts to your team.
Skill 6: Diagram Generator Create professional diagrams in Excalidraw format instantly. Describe what you want to map, and Claude produces a JSON file you can import directly into Excalidraw—no manual drawing required.
Skill 7: Skill Creator This meta-skill helps you build custom skills for your specific needs. Whether you’re a teacher, realtor, designer, or freelancer, describe your repetitive workflow, and Claude packages it into a reusable skill.
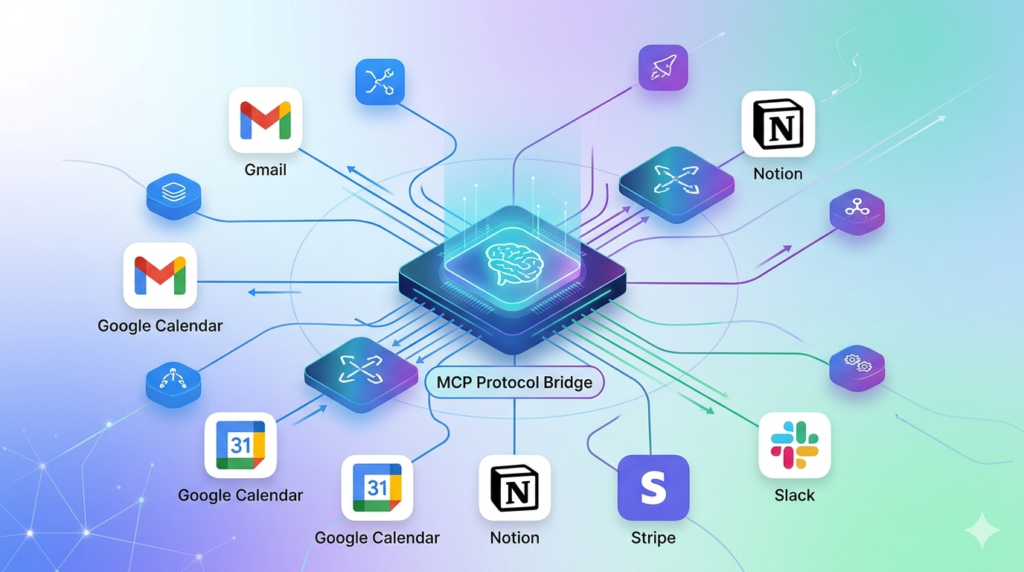
Superpower #3: Connectors That Bridge Your Apps
Without connectors, you’re manually copying, pasting, and screenshotting between apps. With connectors, Claude reads your calendar, accesses Gmail, pulls from Google Drive, and posts to Slack on your behalf. It’s like giving your AI assistant the keys to your entire digital office.
Setting Up Native Connectors
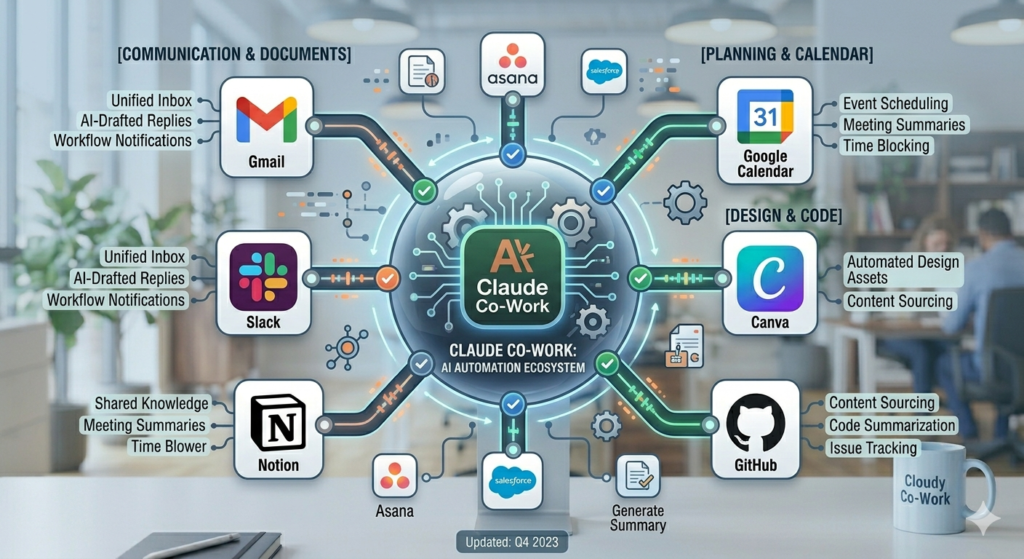
Claude Co-Work offers 38+ native integrations including:
- Gmail and Google Calendar
- Slack
- Notion
- GitHub
- Canva
- Google Drive
Simply navigate to Customize > Connectors, browse available apps, and authorize access. Once connected, it works forever.
The Zapier MCP Hack for Unlimited Integrations

What if your favorite app isn’t natively supported? Enter Zapier MCP—a workaround that connects Claude to 8,000+ apps with 30,000+ possible actions.
Visit zapier.com/mcp, create a new MCP server for Claude Co-Work, and select the tools you need. Whether it’s School, Zendesk, or any other platform, you can grant Claude access without building complex automations. Copy the generated URL, paste it into Claude’s connectors, and suddenly you have unlimited integration possibilities.
Superpower #4: Scheduled Tasks That Run While You Sleep

This is where everything converges into pure automation. Scheduled tasks allow Claude to execute your skills and connectors automatically on your timeline—hourly, daily, weekly, or at specific times.
Real-World Automation Examples
Morning Briefing at 8 AM Before you open your computer, Claude has already:
- Scanned your calendar
- Reviewed your email
- Researched AI news
- Generated an HTML dashboard
- Sent you a Slack DM with the summary
End-of-Day Wrap-up at 6 PM Claude reviews what got done, identifies unfinished tasks, sets tomorrow’s priorities, and reflects on the day’s progress—all without your input.
Weekly Competitor Scan Automatically monitor YouTube and Instagram for competitor activity, generating reports you can review Monday morning.
Setting this up is simple: create your task, write the prompt, select your schedule, and choose which connectors to use. The combination of skills + connectors + scheduled tasks equals a true 24/7 AI employee.
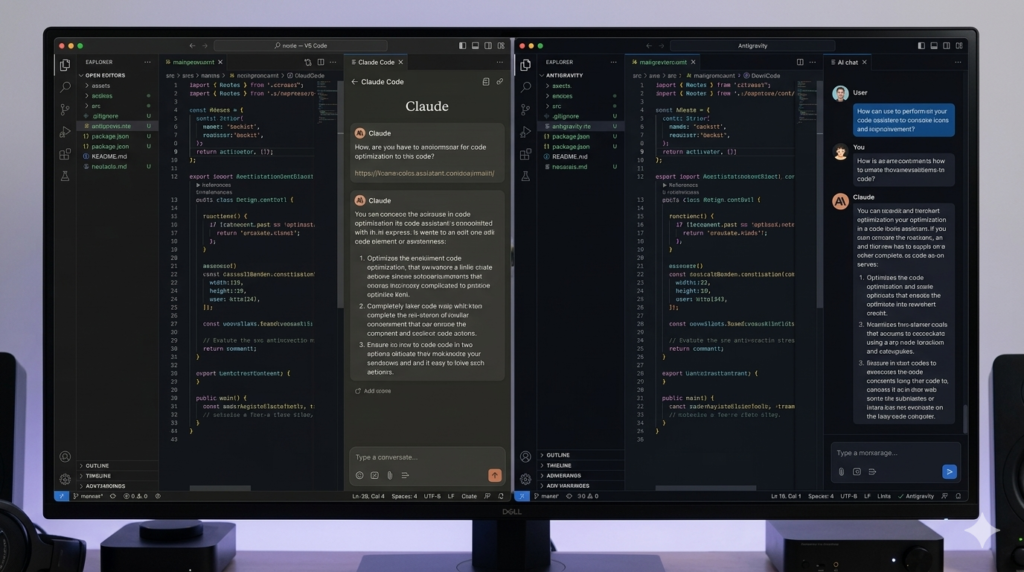
Claude Co-Work vs. Claude Code: Which Should You Use?
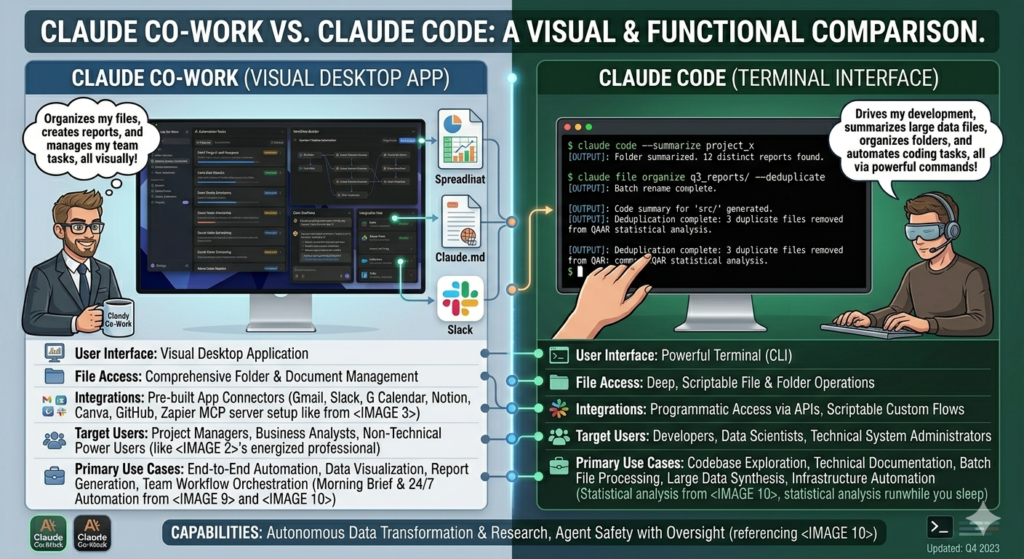
Everyone’s talking about both tools, but they serve different purposes:
Claude Co-Work is your desktop assistant. It features:
- Visual, click-based interface
- File access and organization
- App connectors
- Skills and scheduled tasks
- Sandboxed, protected environment
- Perfect for non-technical users
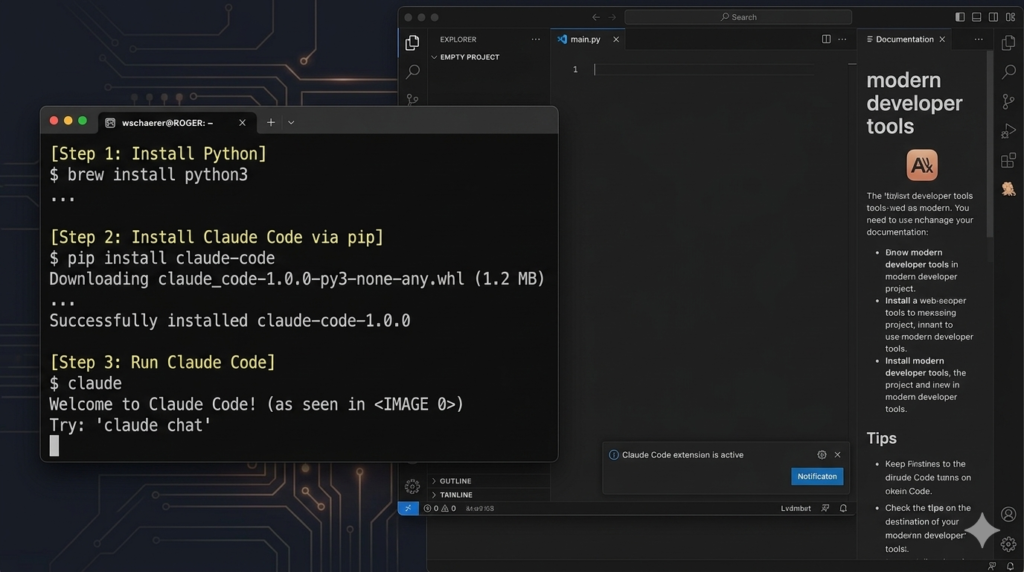
Claude Code is a coding agent that lives in your terminal. It offers:
- Command-line interface
- Direct codebase access
- Code writing and execution
- Production deployment capabilities
- Built for developers and technical builders
If you’re comfortable with terminals and IDEs like Cursor or Visual Studio Code, Claude Code is powerful. But for most people, Claude Co-Work is the sweet spot—offering 80% of the power with 100% more accessibility.
Getting Started Today

The complete Claude Co-Work system combines four elements:
- Claude.md – So it knows who you are
- Skills – So it knows what to do
- Connectors – So it can access your applications
- Scheduled Tasks – So it runs while you sleep
Download the Claude desktop app, create your first project folder, and start with the Claude.md file. Then gradually add skills, connect your apps, and schedule your first automated task. Within hours, you’ll have an AI employee working tirelessly on your behalf.
The skills mentioned in this guide—from morning briefings to slide generators—are available for download and can transform your workflow immediately. Whether you’re a content creator, entrepreneur, student, or professional, Claude Co-Work scales with your needs.
Stop using AI at 10% capacity. Set it up properly once, and watch it work for you 24/7. Your future productive self will thank you.