Do you ever feel like you’re drowning in repetitive tasks? You copy data from one app to another, manually respond to customer inquiries, and spend hours on chores that could be automated. What if you could reclaim that time and put it toward growing your business instead? With Zapier automation, you can do exactly that.
Enter Zapier automation – the ultimate tool that connects over 7,000 of your favorite apps, even if they weren’t designed to work together. With Zapier’s AI-powered features, you can now create sophisticated automated workflows without writing a single line of code.
In this comprehensive guide, we’ll show you exactly how to automate customer feedback responses by connecting Google Forms to Gmail using Zapier automation and AI capabilities. By the end, you’ll have a working automation that saves you hours every week.
What Is Zapier Automation and Why You Need It
Zapier automation is a powerful workflow automation platform that acts as a bridge between different applications. Whether you’re using Gmail, Google Forms, Slack, Salesforce, or any of the 7,000+ supported apps, Zapier automation makes them communicate seamlessly.
The beauty of Zapier automation lies in its simplicity. You don’t need technical expertise or coding knowledge. With the new AI features, you can simply describe what you want in plain English, and Zapier automation will generate the workflow for you.
Learn more: Official Zapier Documentation | Google Forms Guide | Gmail API
Setting Up Your Zapier Automation Account
Getting started with Zapier automation is straightforward. Head to zapier.com and click “Sign Up.” The platform offers a free plan that includes core functionality, perfect for beginners. If you need advanced features, premium plans are available with additional capabilities.
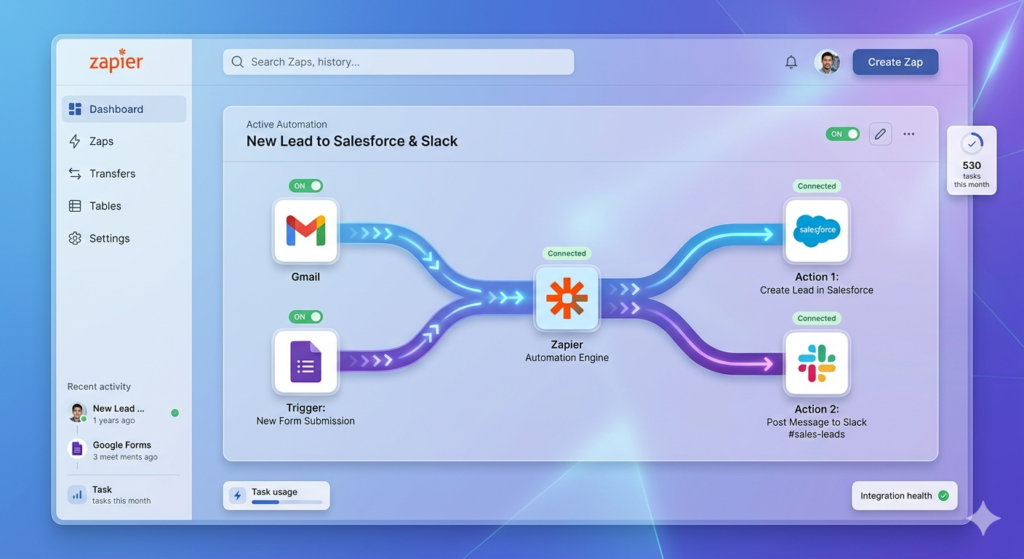
Once you’ve created your account and signed in, you’ll land on the main Zapier automation dashboard. This is your command center for all automation activities.
Related: Check out our Workflow Automation Best Practices guide for more tips.
Exploring the Dashboard: Your Zapier Automation Hub
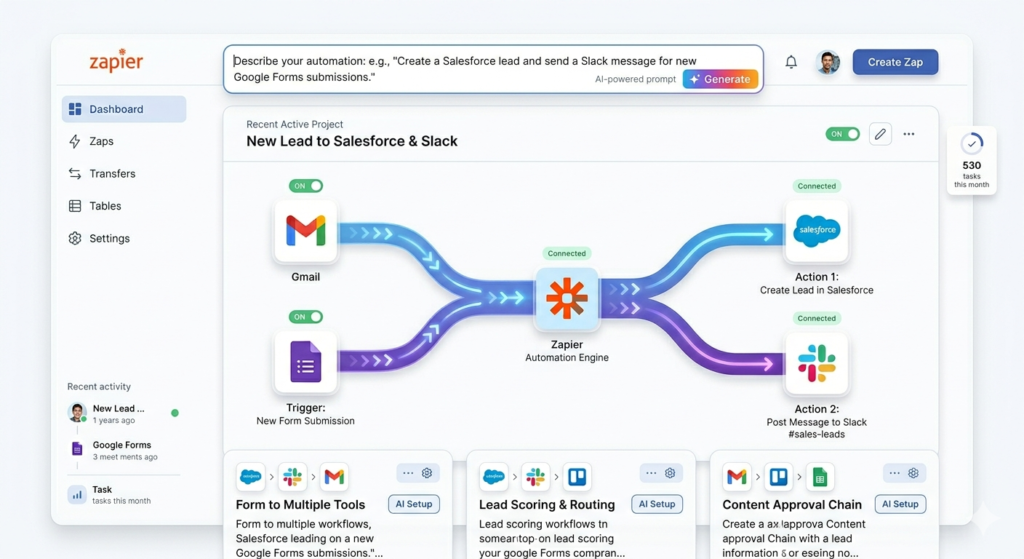
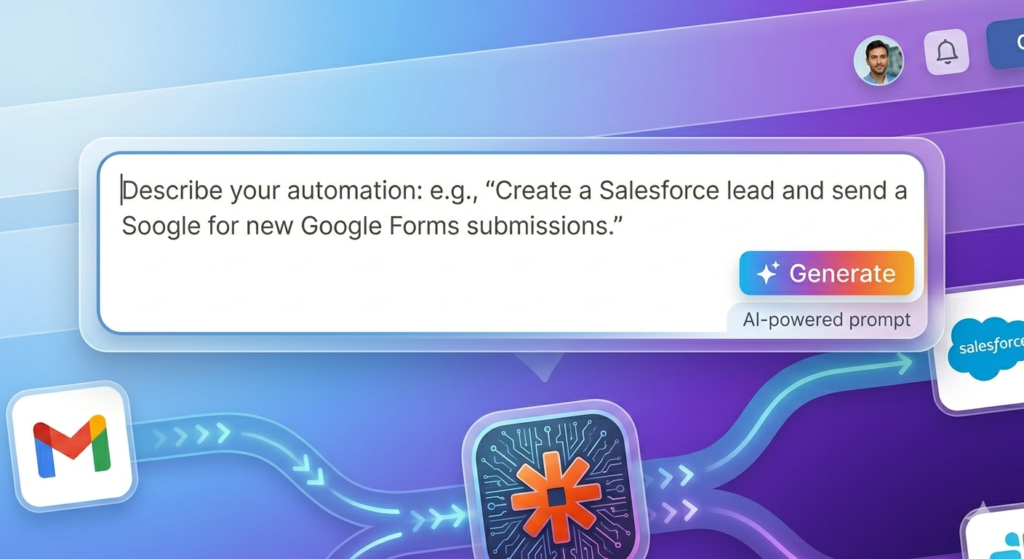
The Zapier automation homepage is designed for efficiency. At the very top, you’ll find the AI prompt field where you can describe the automation you need. This feature uses natural language processing to understand your requirements and suggest workflows instantly.
Below that, you have several options:
- Start from Scratch: Build custom Zaps with full control
- Tables: Create database-like structures
- Interfaces: Build simple web interfaces
- Chatbots: Set up AI-powered chat assistants
- Canvas: Visual workflow builder
Recent projects are easily accessible, and scrolling down reveals popular templates to inspire your Zapier automation journey.
Zapier Automation Templates: Endless Possibilities
Clicking “Browse All Templates” opens a treasure trove of pre-built Zapier automation workflows. You’ll discover integrations like:
- Facebook Leads to Google Sheets
- Gmail to Slack notifications
- Calendly to Zoom meeting creation
- Instagram to Dropbox file saving
- YouTube to Discord announcements
These Zapier automation templates demonstrate the platform’s versatility. Even if apps don’t natively integrate, Zapier automation creates the connection effortlessly.
Explore more: Zapier Template Gallery | Automation Use Cases
Creating Your First Zapier Automation with AI
Let’s build a practical Zapier automation: automatically responding to customer feedback submitted through Google Forms. This real-world example will save hours of manual work.
Step 1: Prompt the Zapier Automation AI
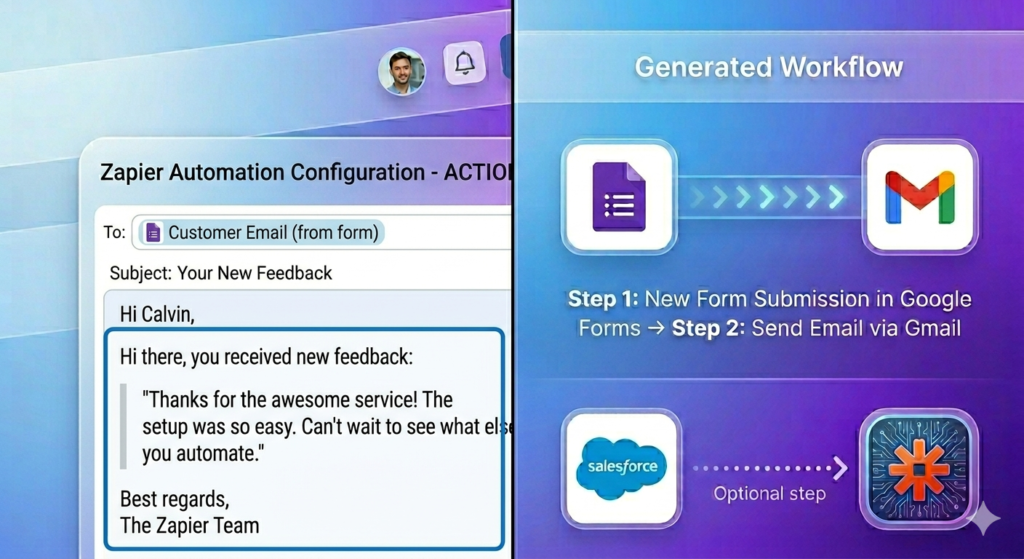
In the AI prompt field at the top of your dashboard, type: “When someone submits a response in Google Forms, send them a thank you email via Gmail.”
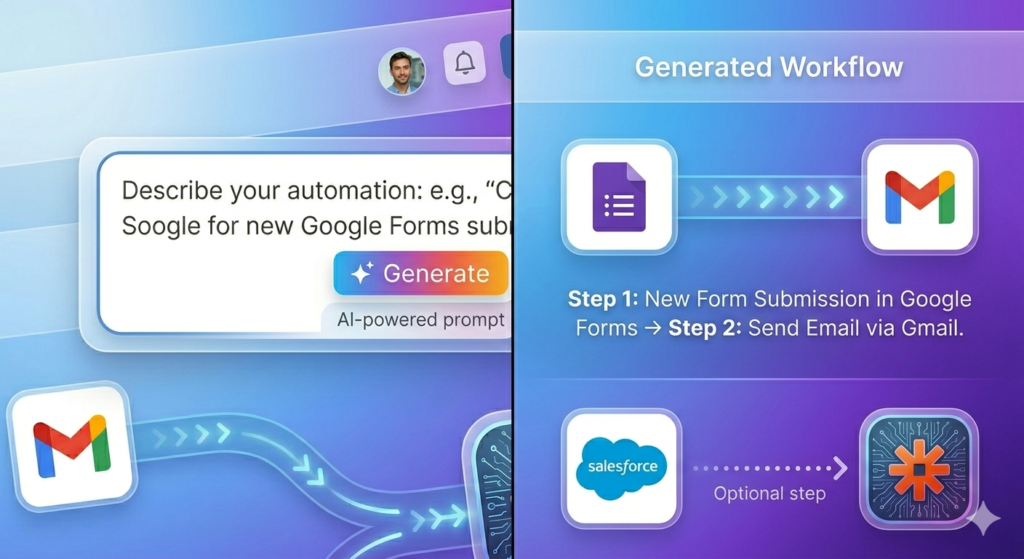
Hit send, and within seconds, Zapier automation AI analyzes your request and proposes a workflow with two steps:
- Trigger: New Google Forms response
- Action: Send Gmail message
Click “Try It” to enter the Canvas editor, where you’ll refine your Zapier automation.
Step 2: Configure Google Forms Trigger in Zapier Automation
The trigger is what initiates your Zapier automation. Click on the Google Forms step to configure it. You’ll need to:
- Select your Google account
- Choose the specific form (e.g., “Customer Feedback Form”)
- Test the trigger to ensure Zapier automation can access sample data
When you test, Zapier automation pulls recent form submissions. You’ll see fields like customer name, email address, and feedback text. This data will power your automated responses.

Step 3: Set Up Gmail Action in Zapier Automation
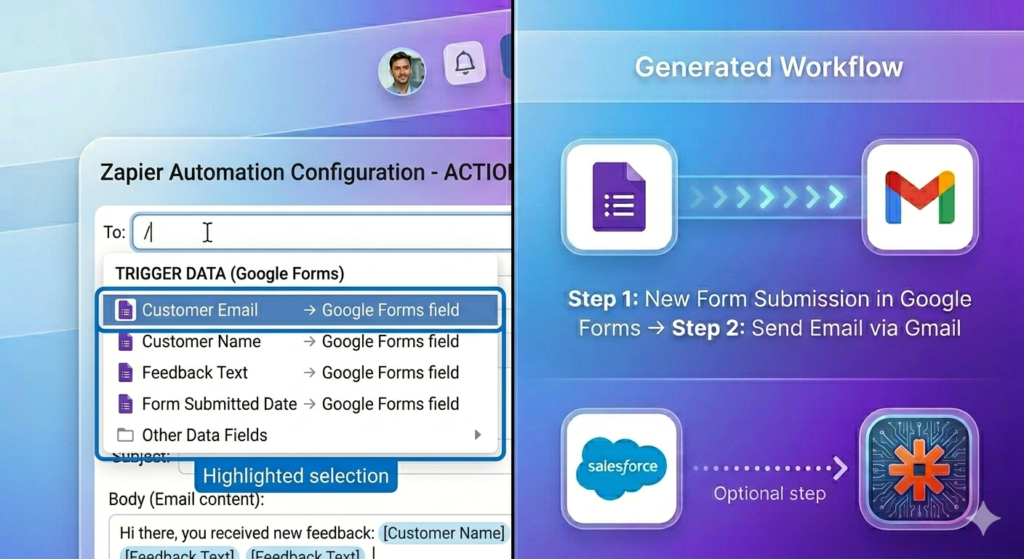
Now, configure the email action in your Zapier automation. Here’s where dynamic values become crucial. Instead of hardcoding email addresses, you’ll use data from the form submission.
Mapping Dynamic Fields:
In the “To” field, type “/” to access field mapping. Select the email address from your Google Form responses. This ensures each reply goes to the correct customer.
For the “From” field, choose your email address.
The subject line could be simple: “Thanks for Your Feedback”
Step 4: Personalize Content in Zapier Automation
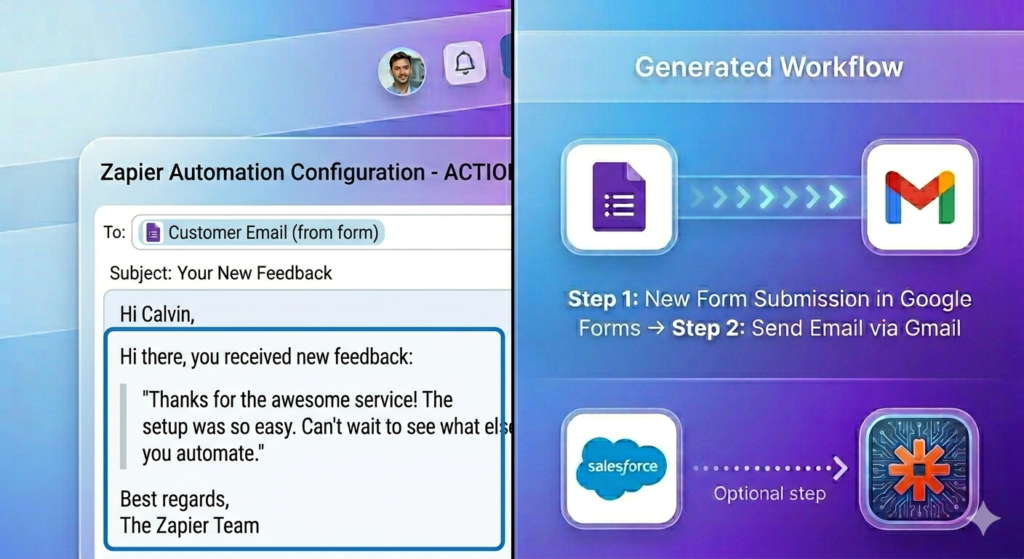
The body of your email should feel personal. Start with “Hi,” then type “/” again to insert the customer’s name dynamically. This pulls directly from the form submission.
Continue with your message: “We appreciate your feedback.” You can even include their actual feedback in the response by inserting another dynamic field.
Test this step to preview the email with sample data. Once satisfied, publish your Zapier automation.
Advanced Zapier Automation: Using Formatter for Data Manipulation
Your basic Zapier automation works, but let’s enhance it. Instead of addressing customers by their full name, use only their first name for a warmer touch.
Adding the Formatter Step to Zapier Automation
Click the “+” icon between your trigger and action to add a step. Search for “Formatter by Zapier” – a built-in tool for transforming data in your Zapier automation workflows.
Configure it as follows:
- Action Event: Text
- Transform: Split Text
- Input: Select the full name field from Google Forms
- Separator: Space (default)
This splits “Calvin Biggs” into separate parts, giving you access to just “Calvin” in your Zapier automation.
Update your Gmail step to use this first name instead of the full name, creating more personalized Zapier automation communication.
Leveraging AI in Zapier Automation for Intelligent Responses
Here’s where things get truly impressive. Instead of generic thank-you messages, use AI in your Zapier automation to generate contextual responses based on the actual feedback.
Setting Up AI by Zapier Automation
Add another step and select “AI by Zapier.” Choose “Initiate Prompt Assistant” and describe your desired action:
“Read the customer feedback and respond via email. Address the customer by their first name and provide a thoughtful response to their specific feedback.”
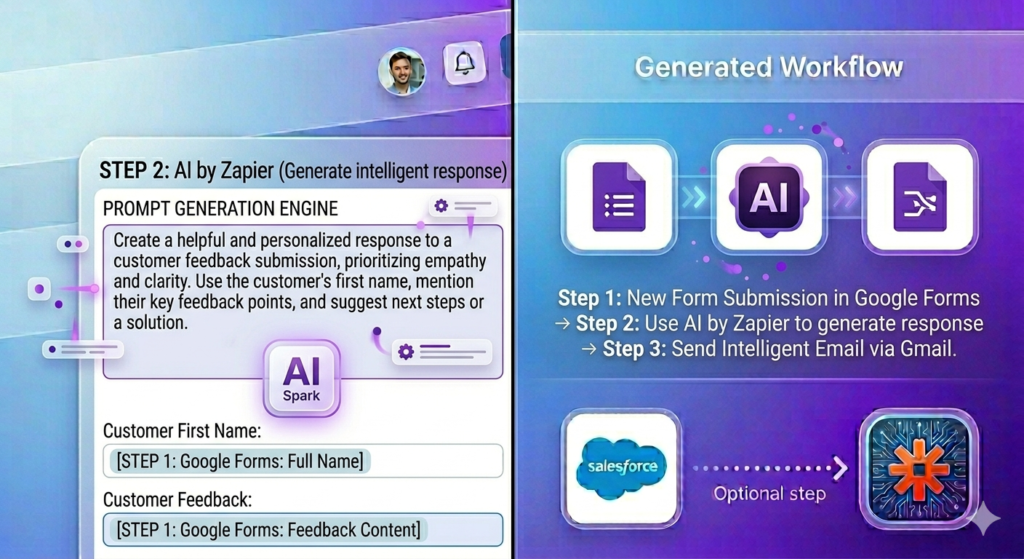
Configuring AI Inputs in Zapier Automation
Map the inputs:
- Customer Feedback: Select from Google Forms data
- Customer First Name: Use the Formatter output
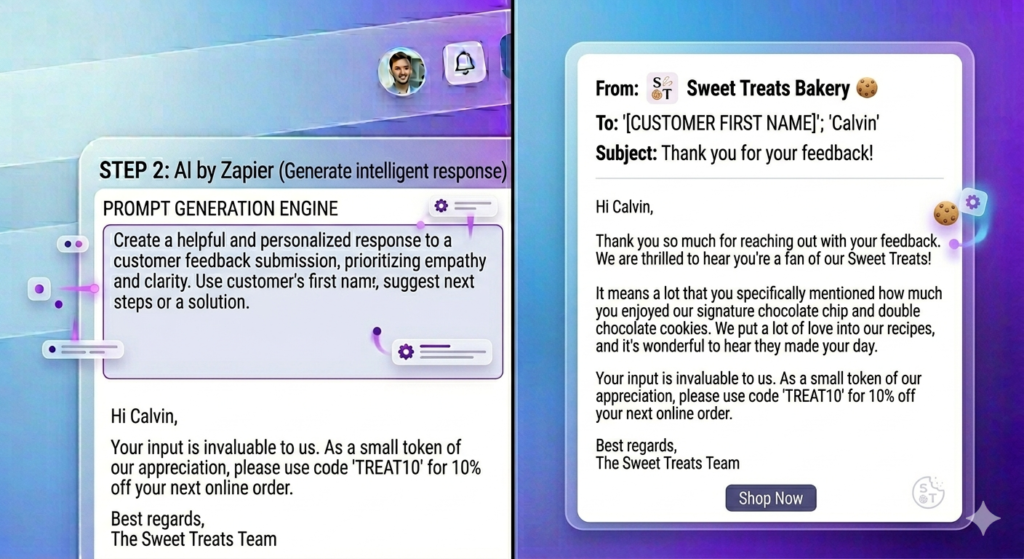
The AI in Zapier automation generates a prompt that reads the feedback and crafts a personalized response. For positive feedback like “Tasty cookies, bruh!” the AI might respond: “Thank you for your enthusiastic feedback about our cookies!”
Updating Gmail with AI Response in Zapier Automation
Replace your static email body with the AI-generated response from Zapier automation. Insert the dynamic field from “AI by Zapier” containing the intelligent reply.
Test the complete Zapier automation workflow, publish it, and watch as thoughtful, personalized responses fly out automatically.
Testing and Publishing Your Zapier Automation
Before going live, thoroughly test each step of your Zapier automation:
- Submit a test Google Form entry
- Verify the trigger captures data correctly
- Confirm the Formatter splits the name properly
- Check the AI generates appropriate responses
- Ensure the email arrives with correct personalization
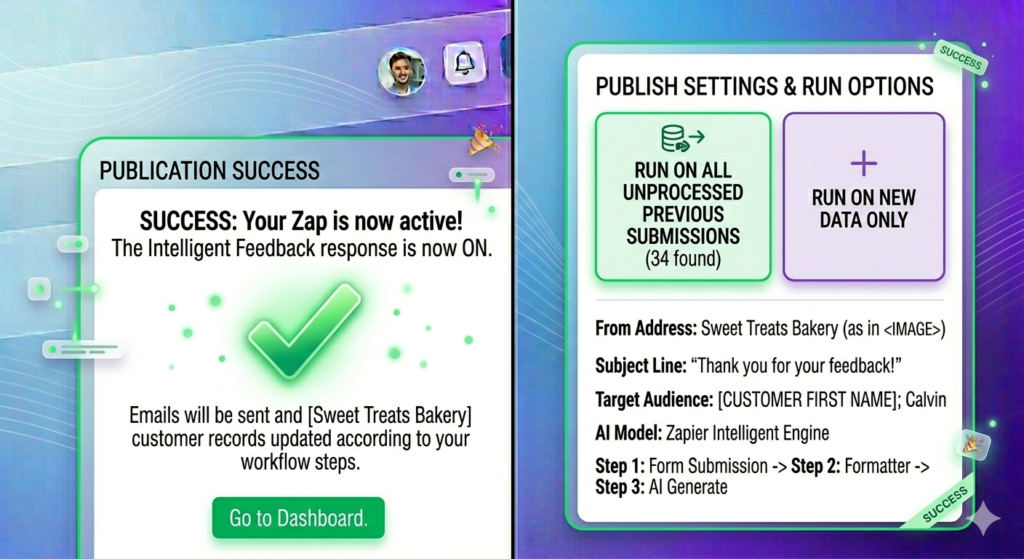
Once everything works, click “Publish” in Zapier automation. Choose whether to run the Zap on historical data or only new submissions.
Helpful resources: Zapier Testing Guide | Troubleshooting Zaps
Beyond Basics: Advanced Zapier Automation Features
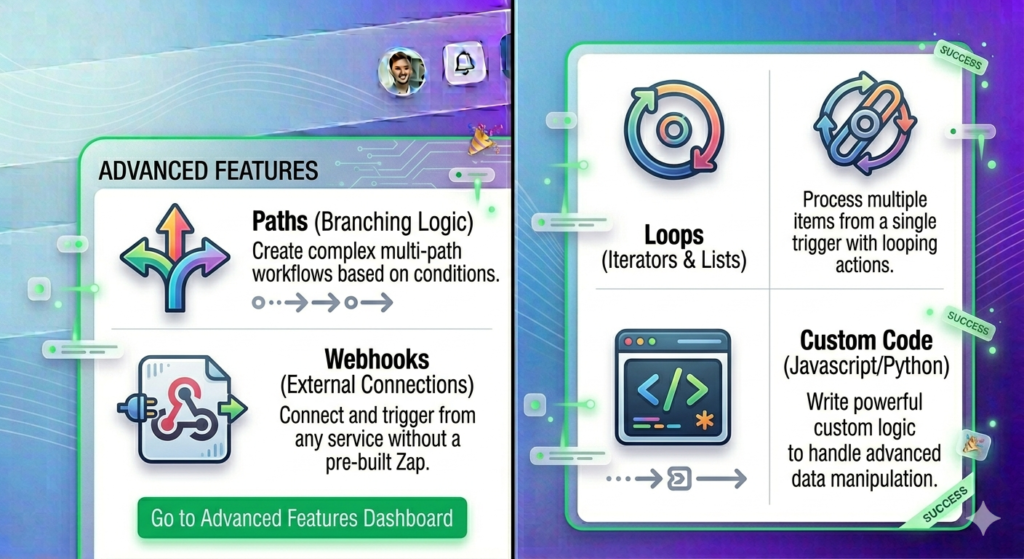
This Zapier automation is just the beginning. Zapier offers powerful advanced features:
- Paths: Add conditional logic (if feedback is negative, alert manager)
- Loops: Process multiple items automatically
- Webhooks: Connect to custom applications
- Custom Code: Add JavaScript or Python for complex transformations
- Multi-Step Zaps: Chain together numerous actions across different apps
Next steps: Read our Advanced Automation Strategies article or explore Zapier Integrations.
Conclusion: Start Your Zapier Automation Journey Today
In just minutes, you’ve learned to create a sophisticated Zapier automation that:
- Captures customer feedback from Google Forms
- Uses AI to generate personalized responses
- Sends professional emails automatically
- Saves hours of manual work weekly
The Zapier automation workflow we built connects Google Forms and Gmail, but you can apply these same principles to thousands of app combinations. Imagine automating lead nurturing, social media posting, data entry, or customer onboarding with Zapier automation.
Zapier automation’s AI capabilities make workflow automation accessible to everyone, regardless of technical background. Start simple, then gradually build more complex Zapier automation workflows as you grow comfortable.
Ready to transform your productivity with Zapier automation? Create your free Zapier account today and start automating. Your future self will thank you for the time you save.

What Zapier automation will you build first? The possibilities are endless with Zapier automation.
Leave a Reply